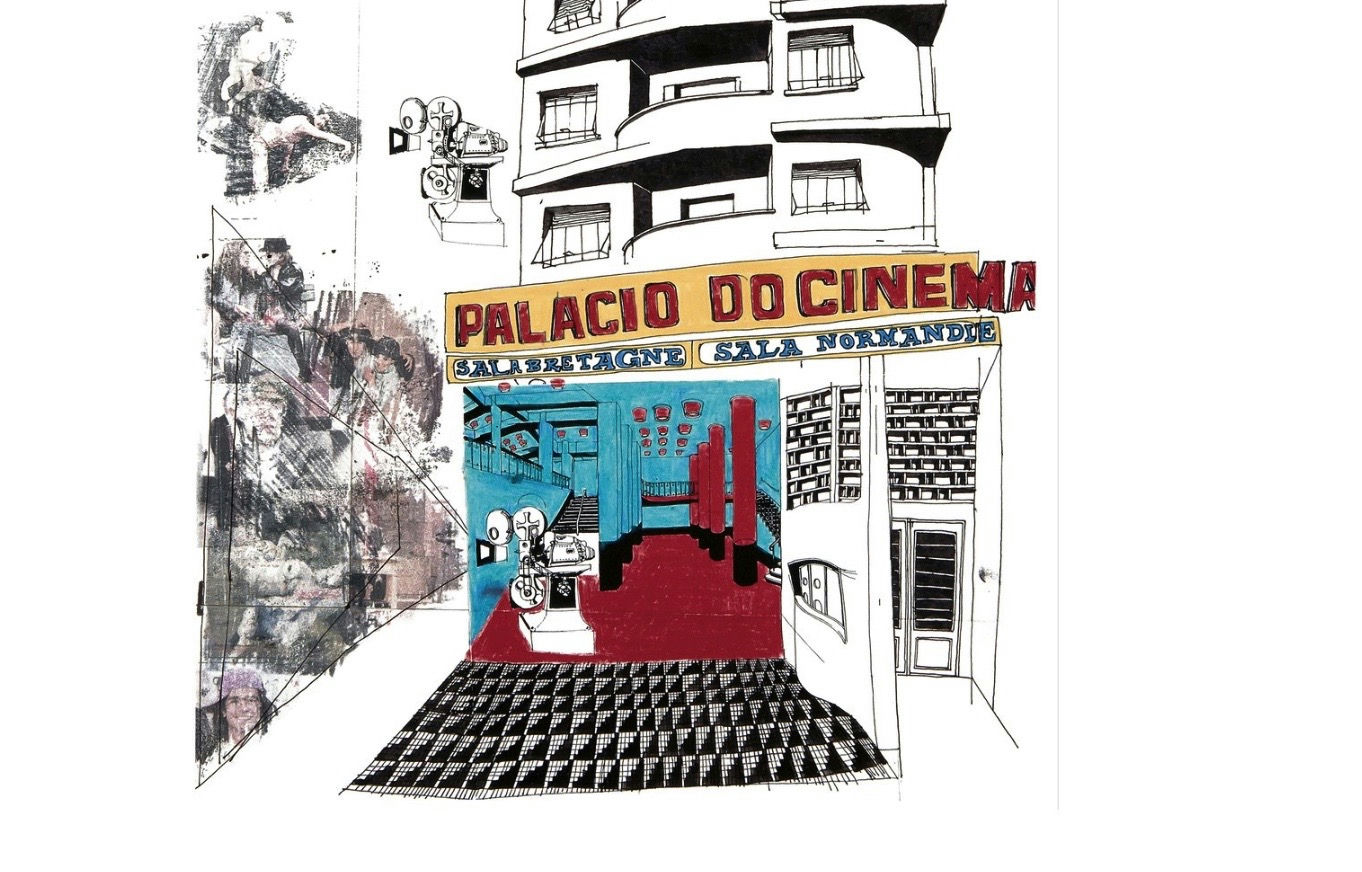
When I think about design sketches, I recall the words from a production designer I was working for as an art director back in 2003, 2004. He told me my drawings “give dreams to those who saw them. The drawings are not perfectly real. It is a lie, but it is a good lie.” That’s about when I was still drawing all my set renderings and construction blueprints on physical paper, all by hand, using pencils, graphic markers, and watercolor paints.
It has been a long time since I moved to the digital drawing world, but I still believe in the magical power of hand-drawn designs.
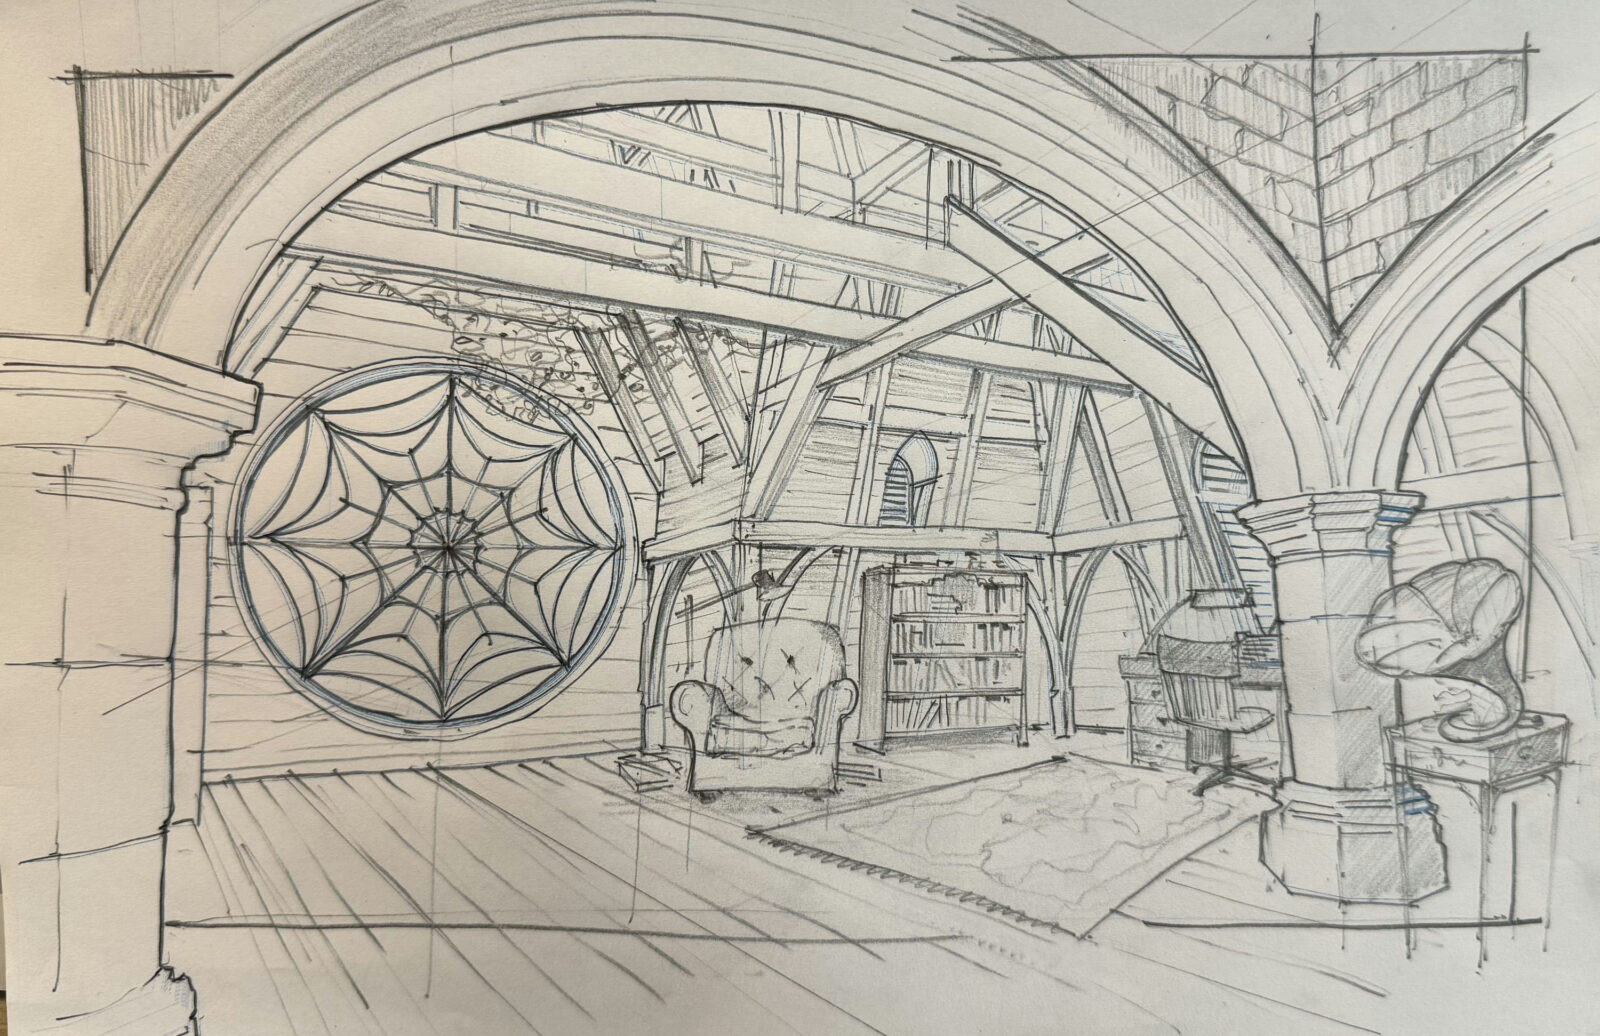
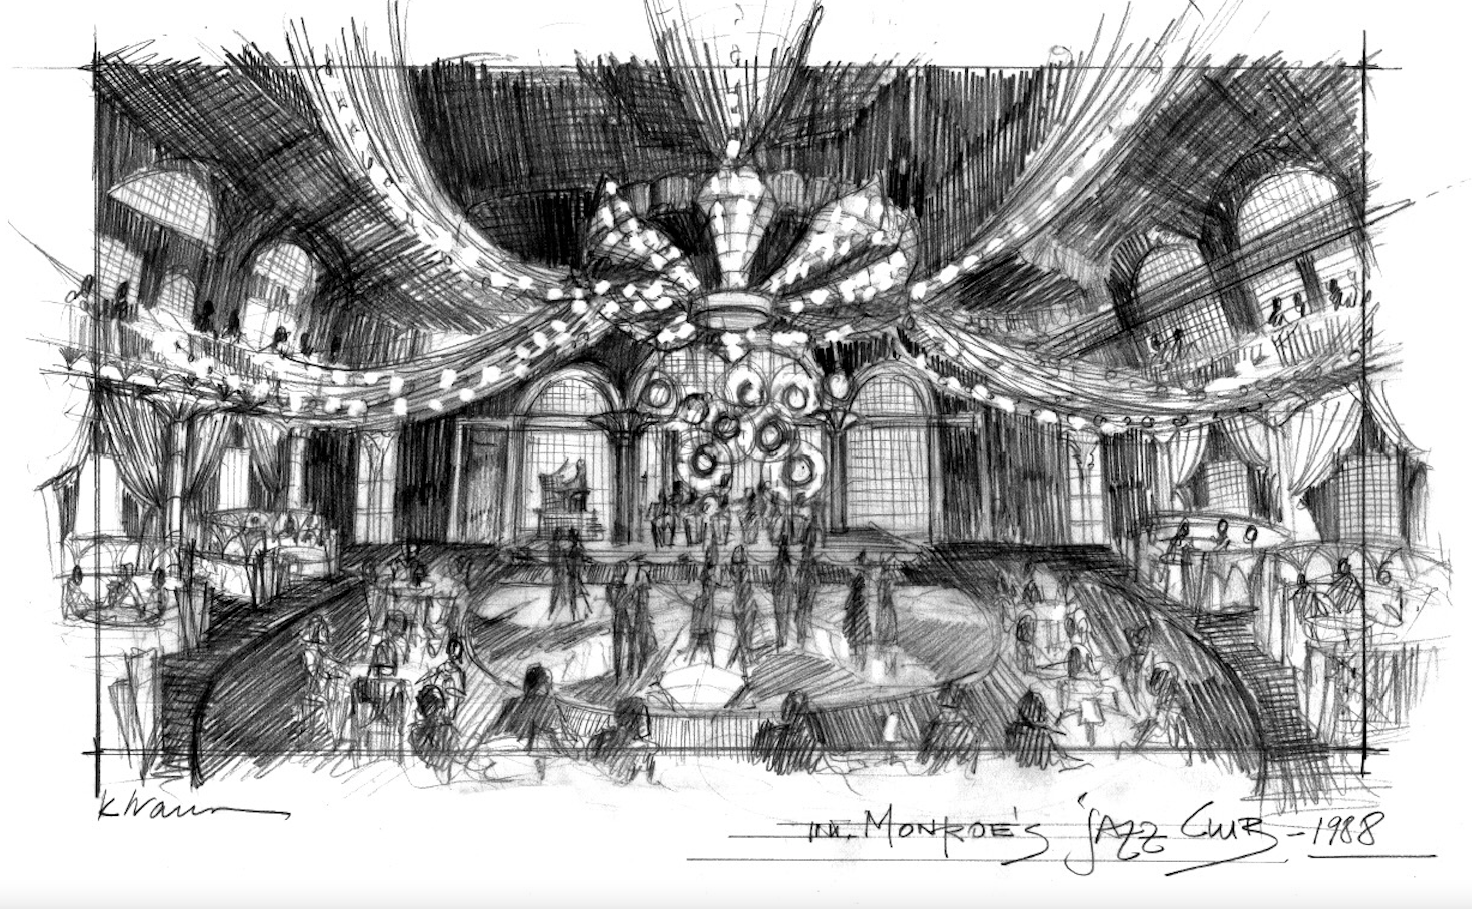
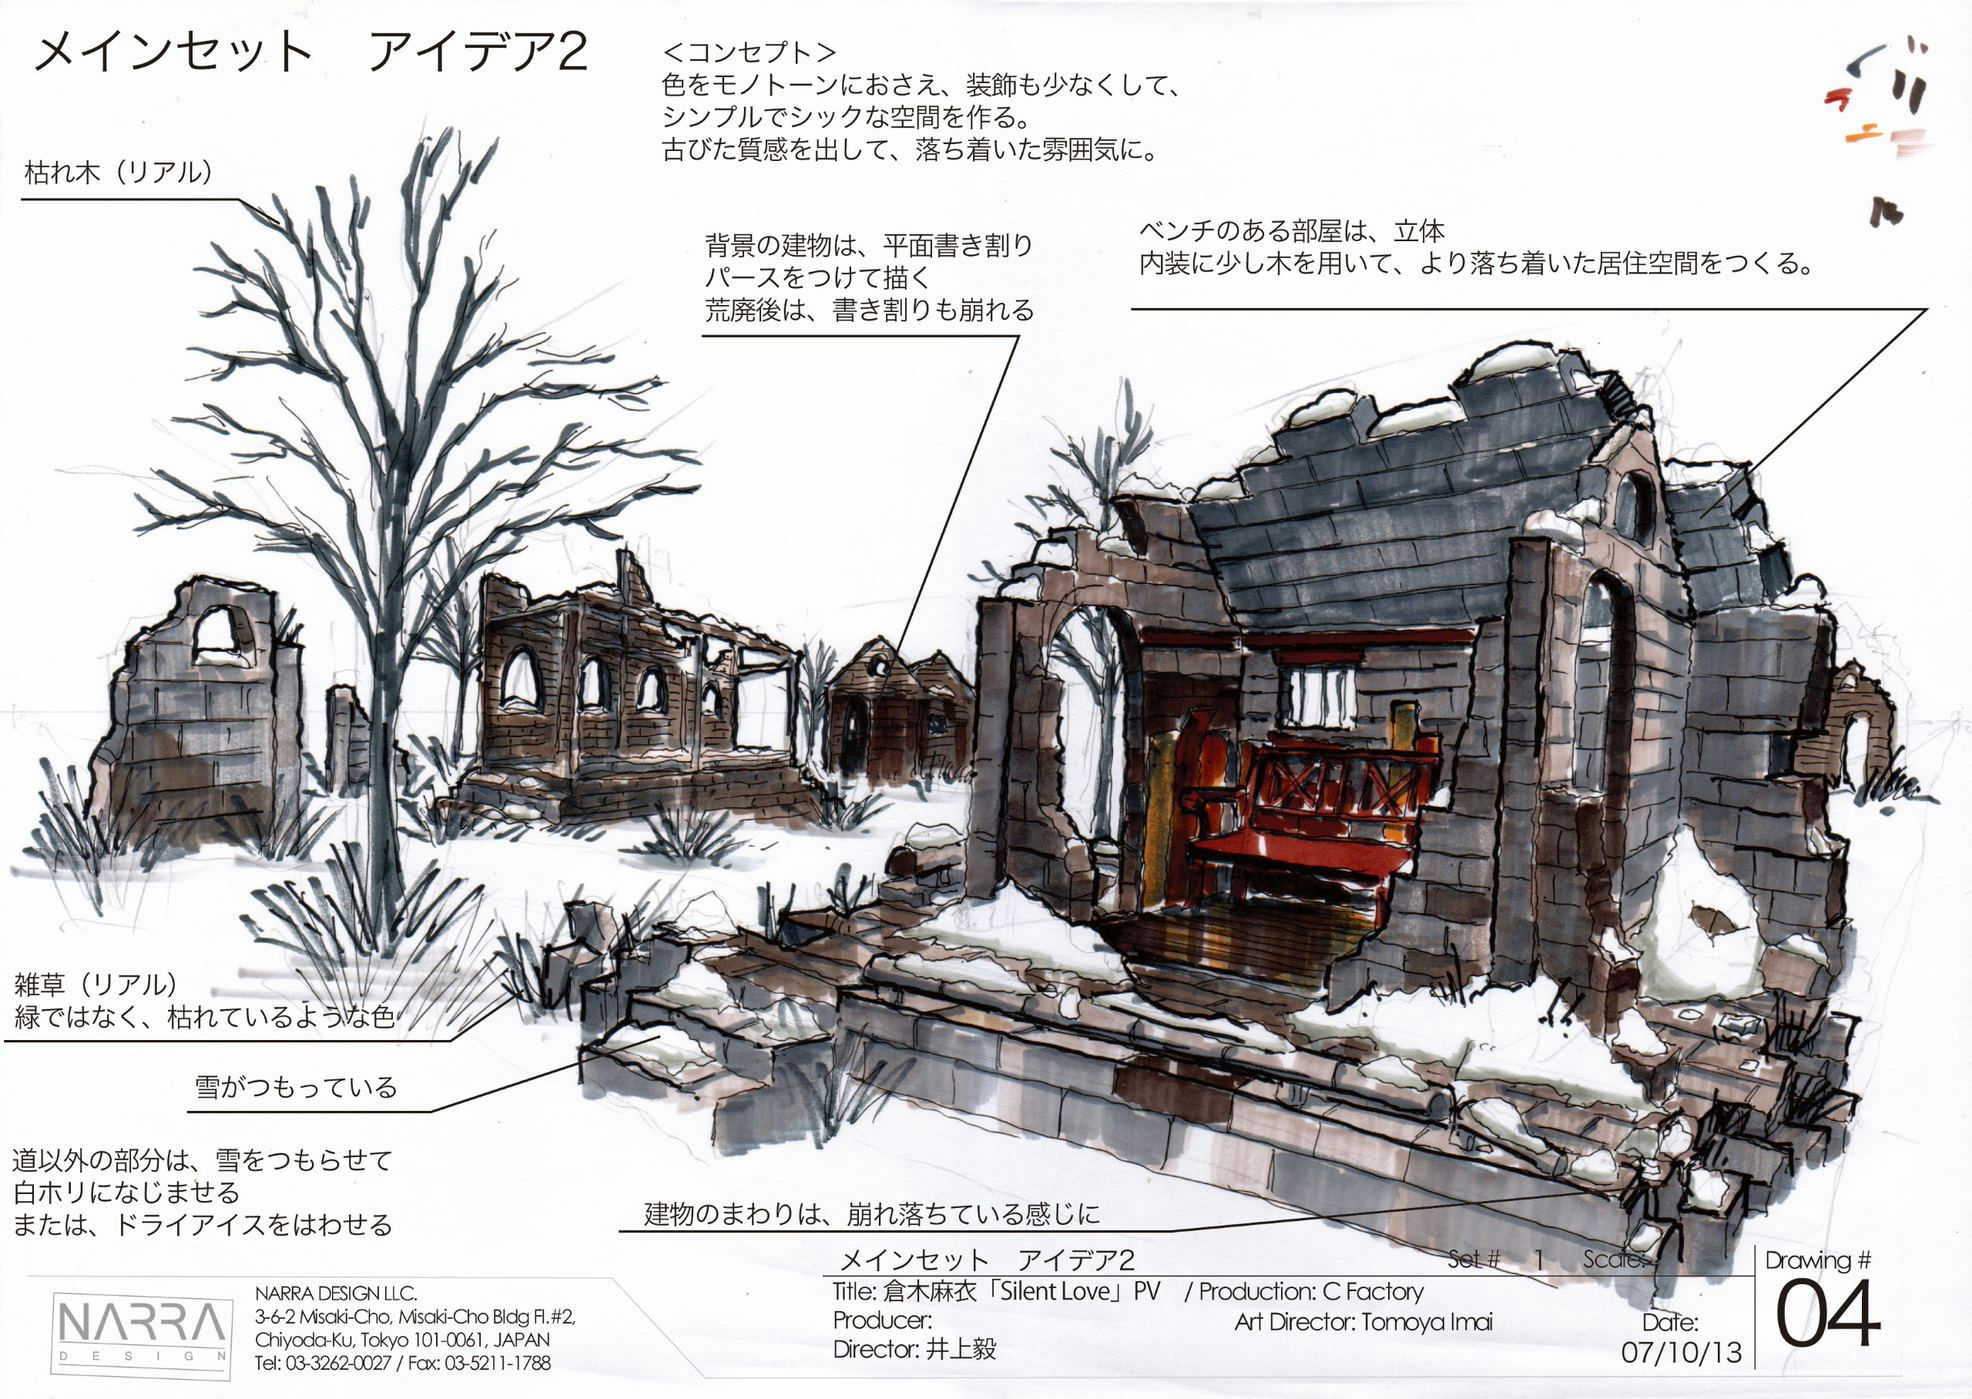
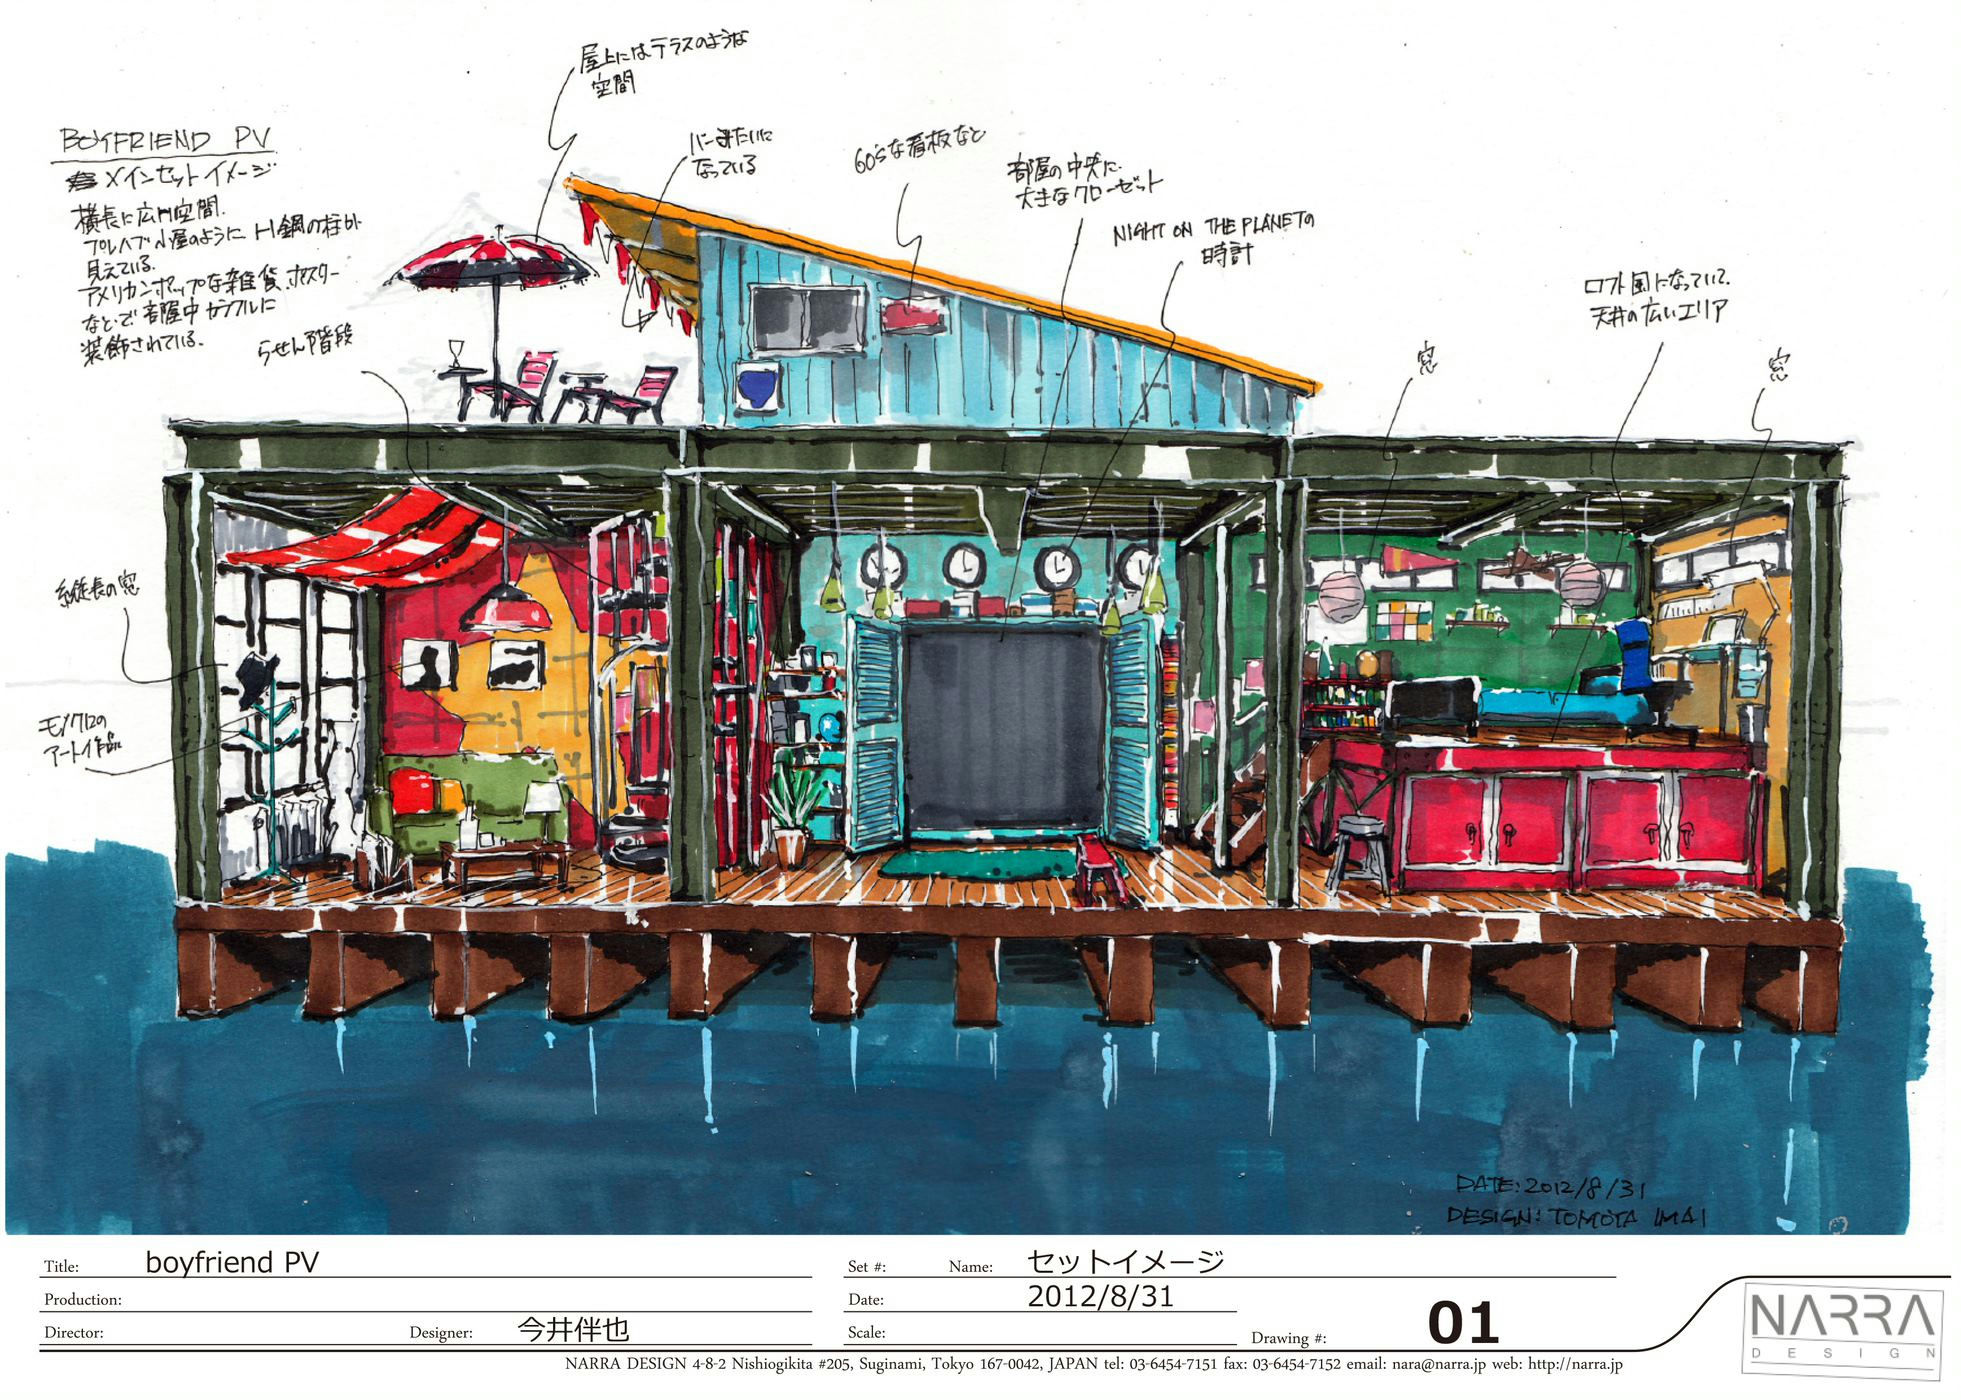
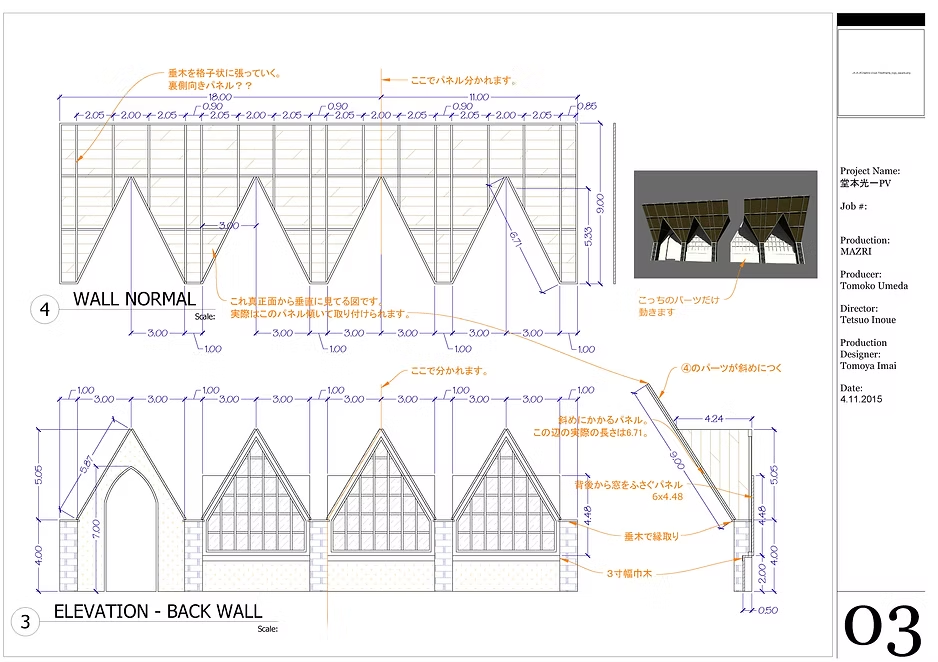
The very purpose of creating these set renderings and blueprints are to give other members of the team a clear vision and direction of what we are doing. It is to tell the director, producers, clients, cinematographers, as well as other art department crew, such as set decorators, construction supervisors, scenic artists, what the production designer has in his/her mind, and what our goal is in terms of how the film, and each set, should look. Then each member can proceed with their jobs with the clear vision of what their work should look like in the final product. So the drawings should not only be good and impactful in terms of the design, but also clear and precise enough in terms of the information being transferred to whoever sees them. In theory, the clearer and closer to how the final set looks, the better these drawings are.
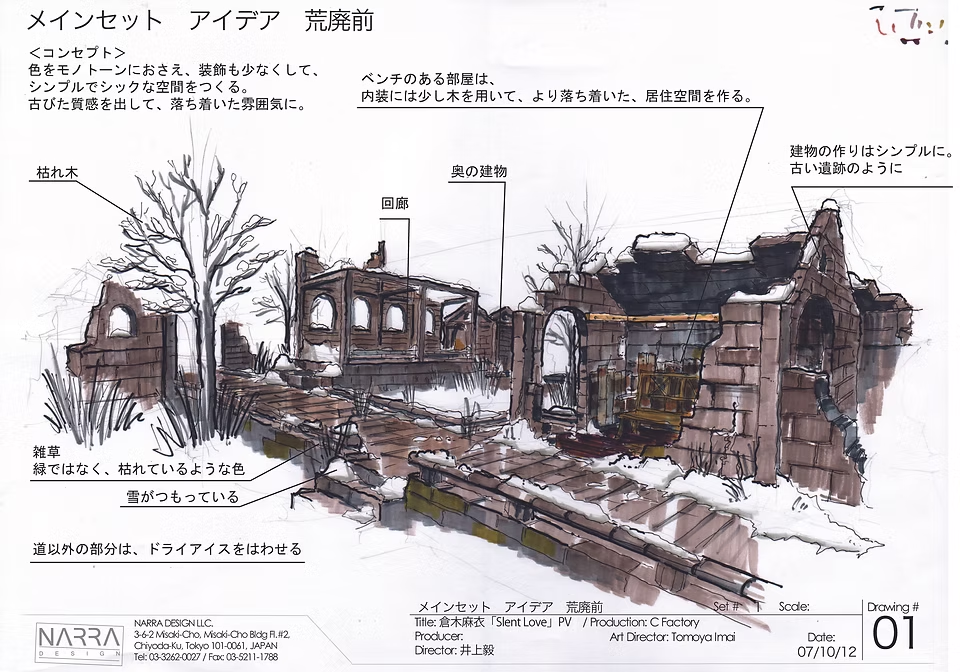
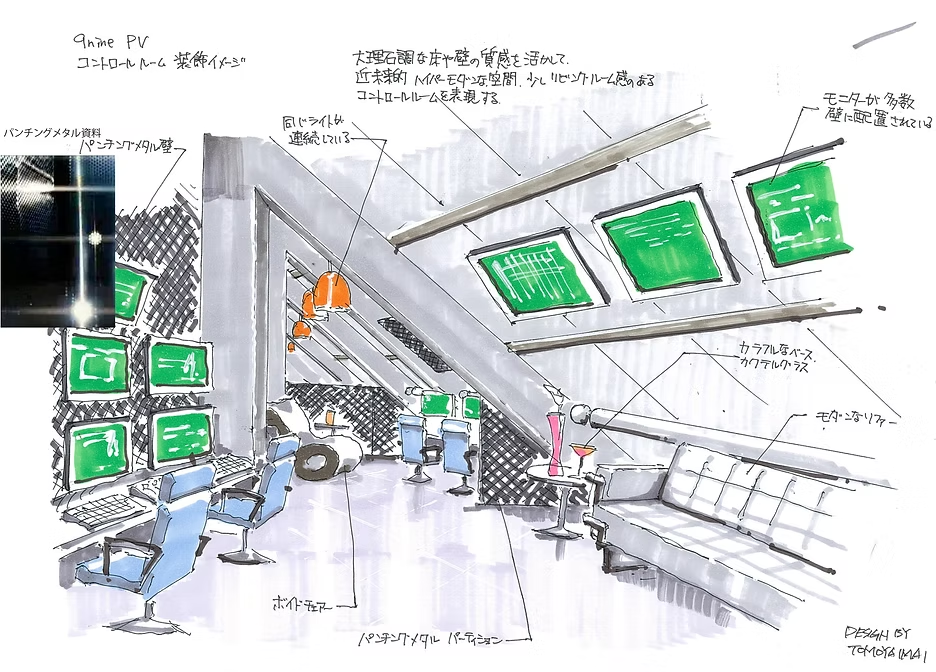
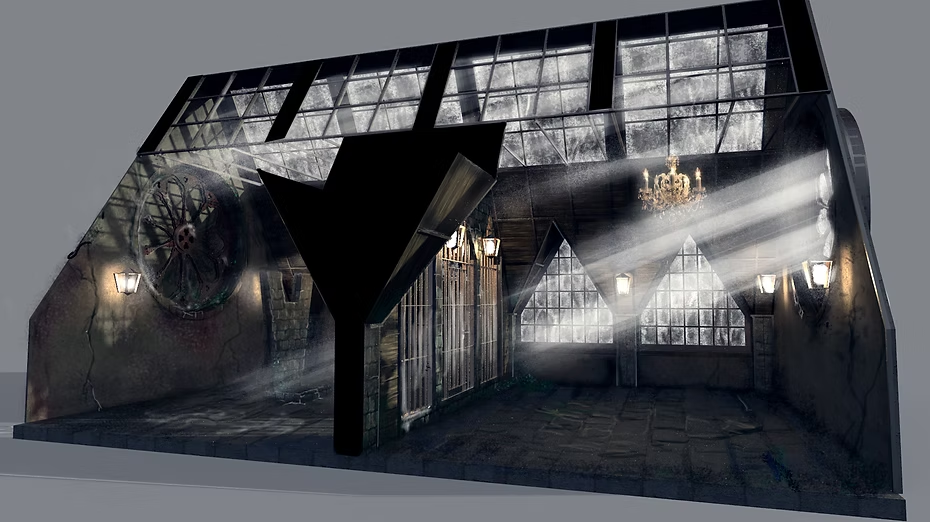
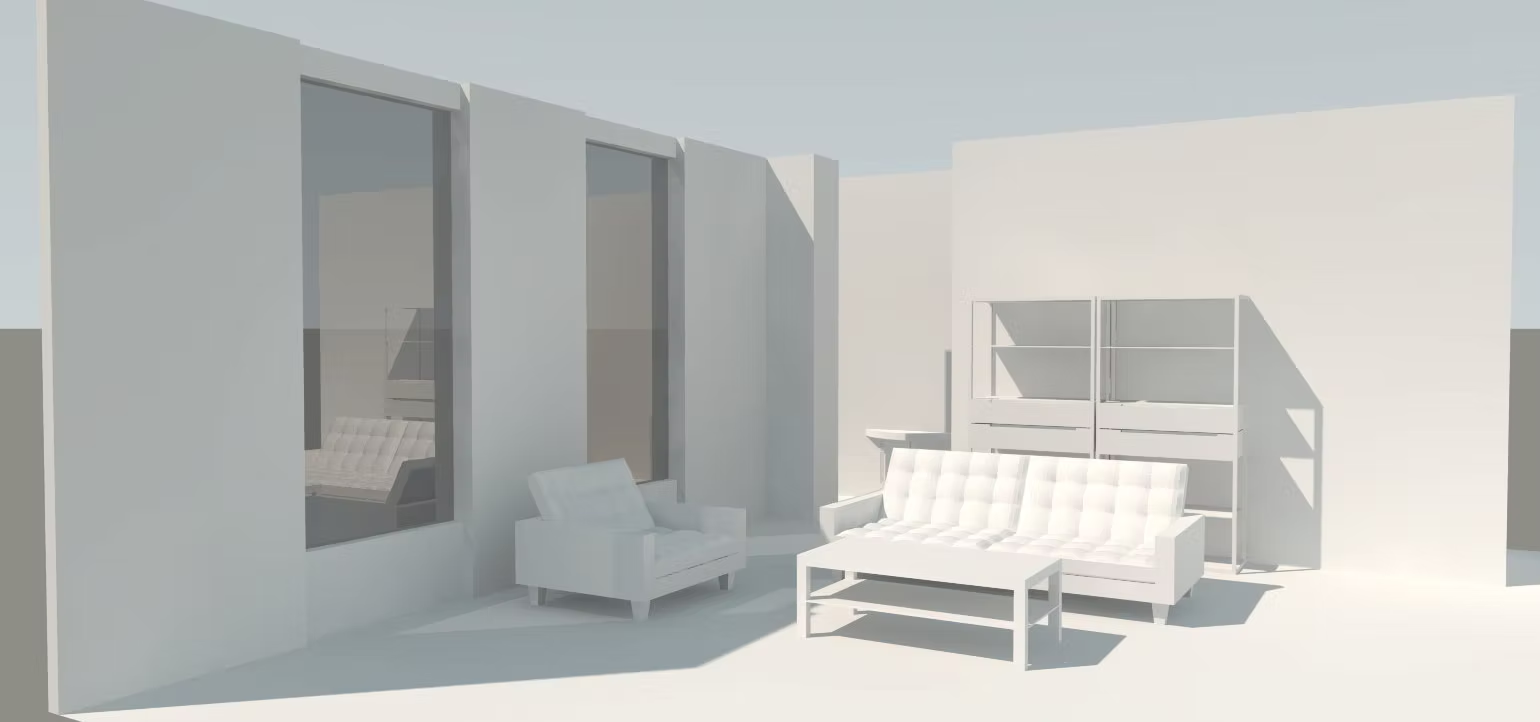
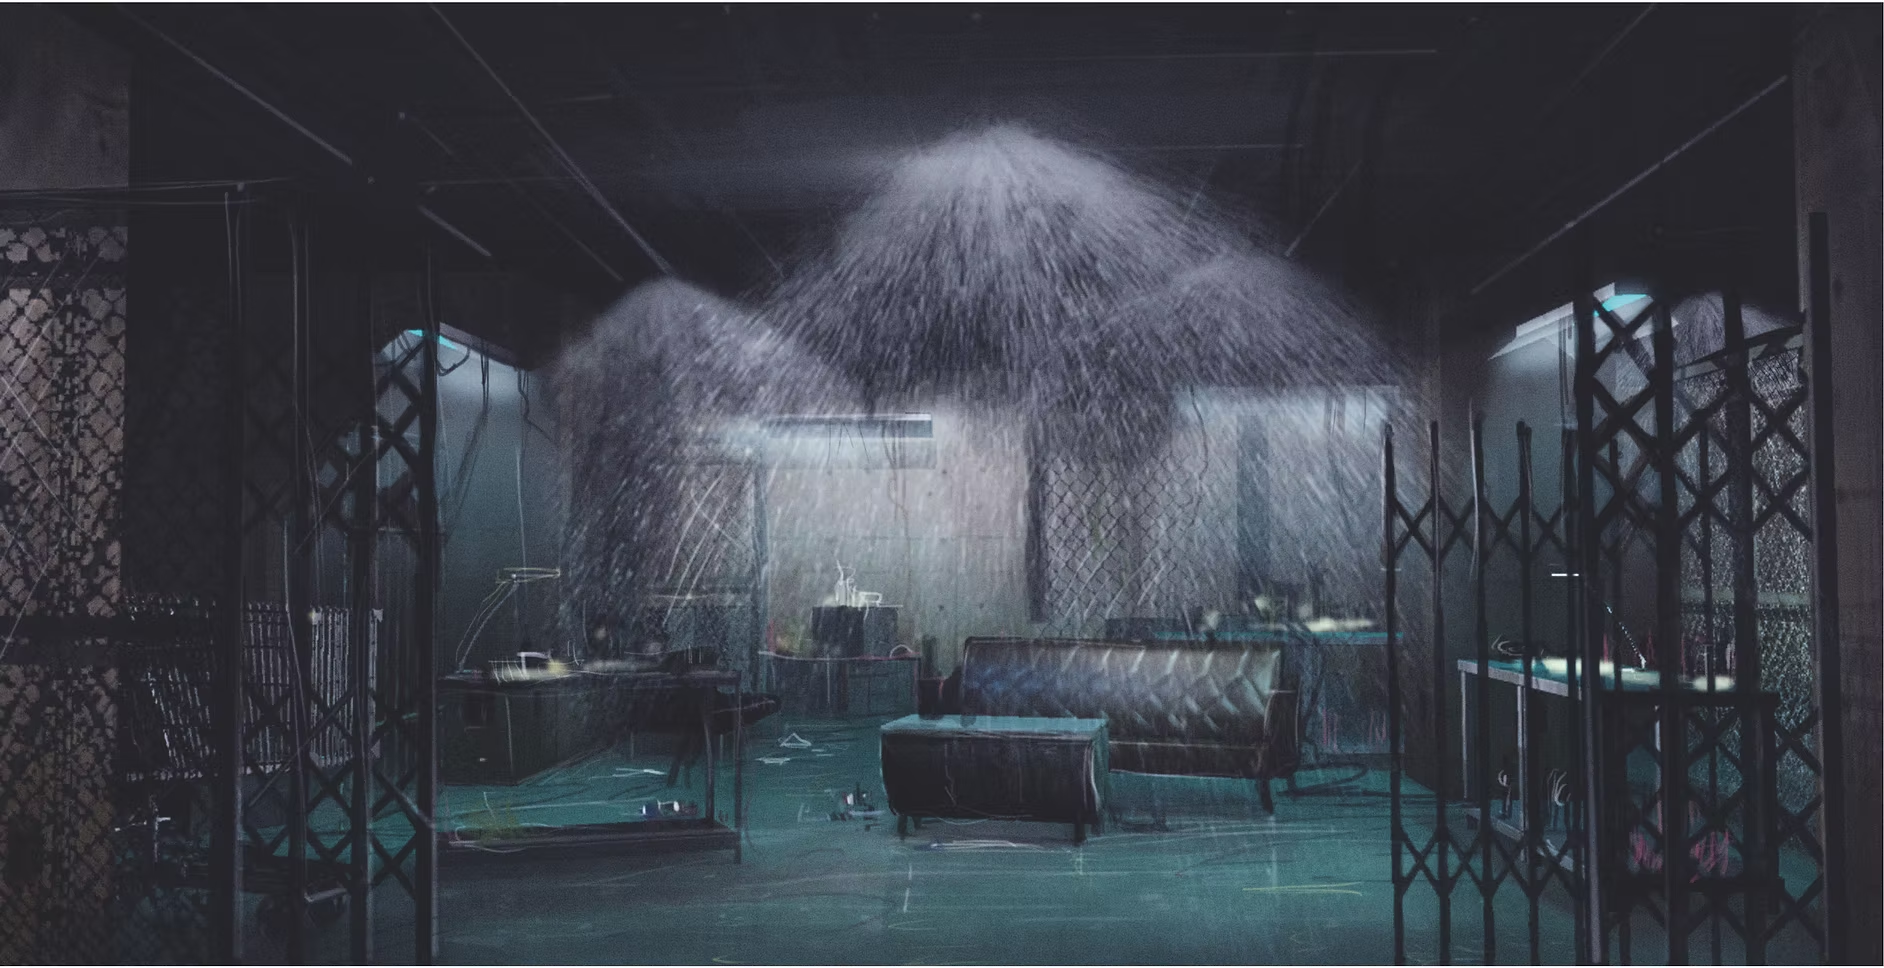
Using recent 3D rendering software and Photoshop techniques, it is very possible to visualize almost 100% of how the final set would look in the design sketches, while I’d say we could only do 70% of it back when we were doing it by hand. When the final vision is clear enough, the set decorator knows exactly what kind of props he/she should source, and scenic artist knows precicely how the wall color and aging should look. In that manner, detailed renderings created by 3D graphics software and photoshop do a lot better job than hand drawings. It is simply hard for the crew members, when they are only informed 70% of what they should do, to provide and reach to the full 100% of the designer’s vision.
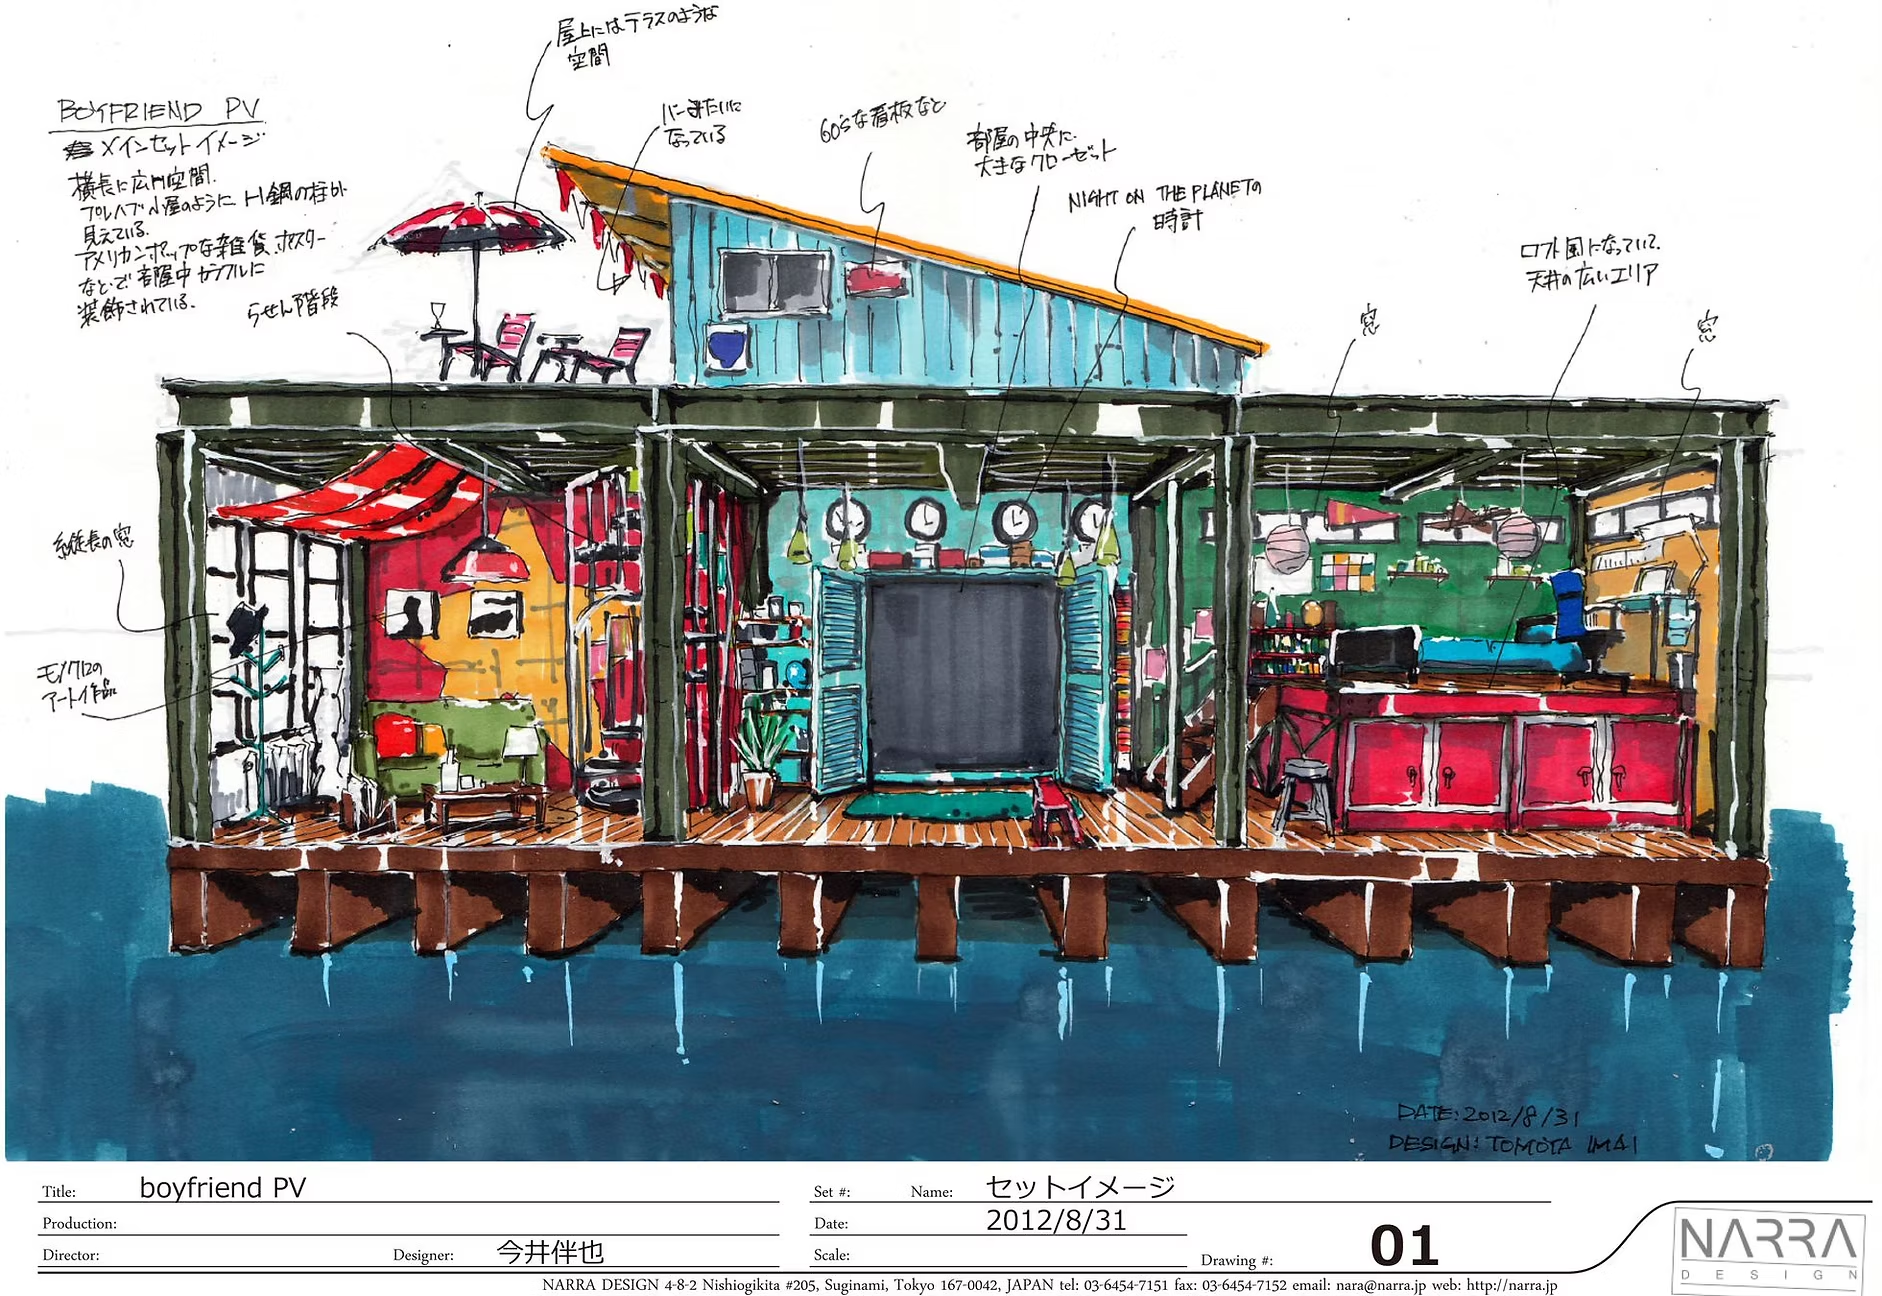
The magic of the hand drawn sketches happen when these drawings only provide 70% of the information, and yet other crew provide the 120% of the design. That means each crew takes 70% of the production designer’s ideas, and provide back something beyond the designer’s imagination. When the renderings give the direction that is too clear to these crew, it leaves no room for any imagination to grow, and prevents the crew from trying new things. Letting the rest of the team try new things can do both good and bad to the design, so it is a double-edged sword, but when you believe you have a good team around you who can better your design, and you are confident with your drawings that can grow the imaginations of other team members, you can expect to be able to create something beyond your imagination at the end. That is when hand drawn renderings do a better job than precise 3D renderings.
It is maybe a style difference of the production designer. As a production designer, you are responsible to create a team that works best for you in making your vision come true in real scale. One would think he/she can provide the perfect and precise plan, and as long as everyone in the team follows that golden plan, you can achieve the 100% of your design. Other designers might just let the others do the best of their jobs and just hope they all come out looking good. I’m a kind of the designer who takes the latter approach.
I believe that filmmaking is a teamwork, and I believe every set decorator would know more about furniture than I do, and each carpenter would know more about how to build a set than what my understanding is. But then there are many designers who I worked for who have so much variety of experience in each of the art department positions, that they can precisely direct each member what to do, so there’s no confusion. So that’s just their style.

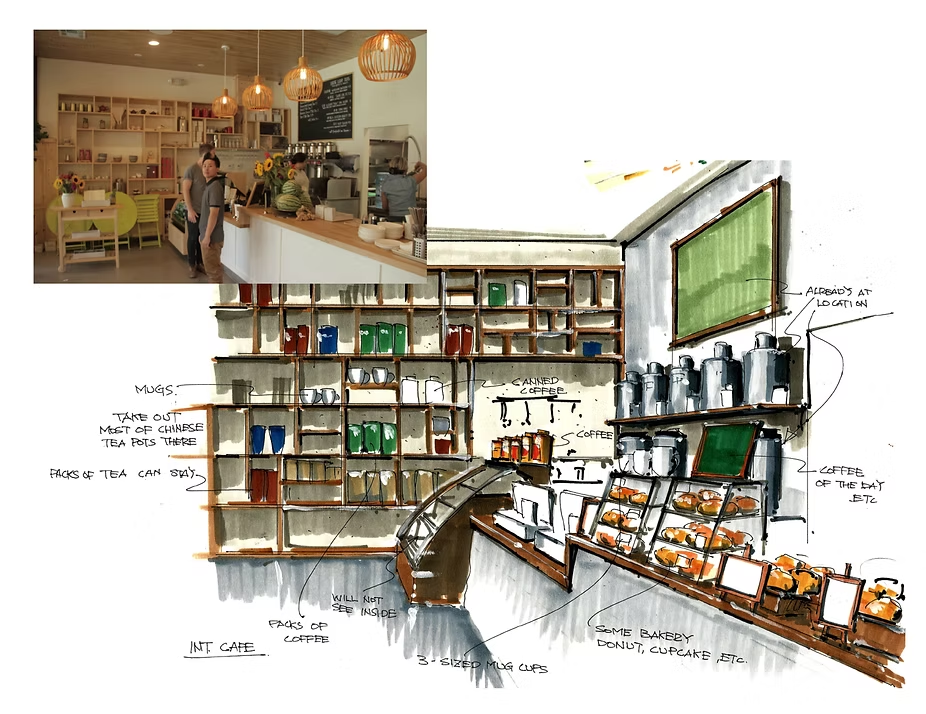
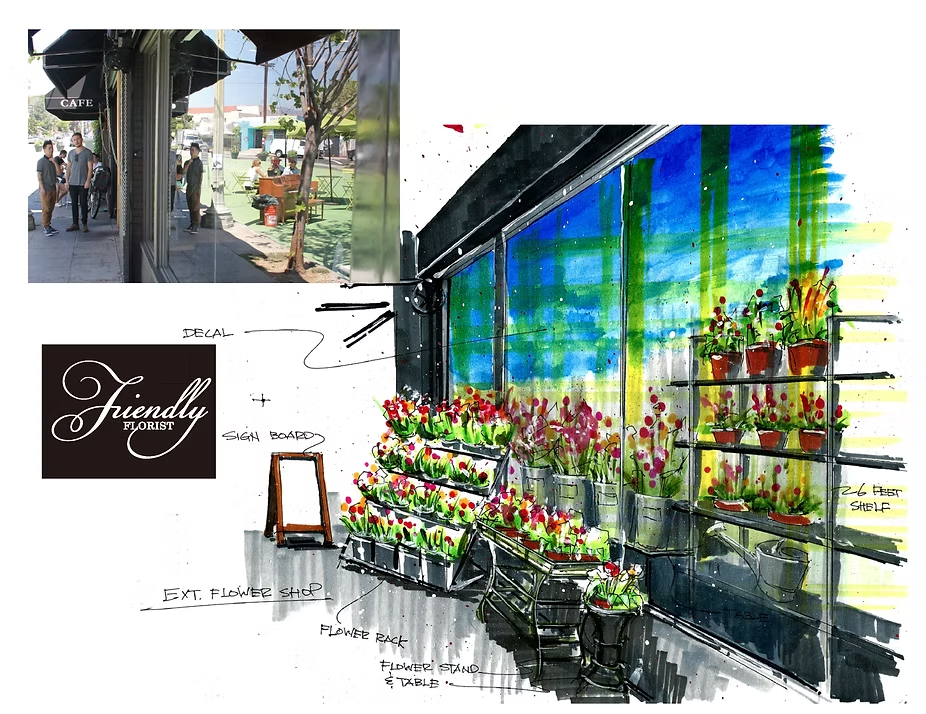
Many production designers hire me just as renderers for their projects these days. When I hear from other art directors what the production designers are thinking of my drawings I often hear that they think my works are “fast, precise, and kind of look nicer than the reality.” It is because even these days when I use 3D programs and photoshop for my drawings, I always add some “flavors” with hand drawing, either with stylus pens, or sometimes painting on top of the paper print out of the 3D renderings, in order to make it look rough, less precise, fuzzy in detail, keeping some room for whoever sees the drawing to imagine. That means I am drawing a fiction, telling a lie, but I believe it is a good lie, for the good of the film.
So for the fellow production designers, or someone who is just starting out, I would encourage to take a pencil and start drawing by hand. And someday that pencil will become your magic wand, and you’ll be creating something beyond your imagination.
When I hear from my fellow art directors who are trying to become production designers that they aren’t good at drawing, I always tell them to follow these simple and easy steps, then they won’t have to worry about their drawing skills for the rest of their lives.
-
Buy 6 standard sketchpads. They don’t have to be nice or expensive.
-
On the first page of the first sketchpad, draw circles. Fill out the page with circles, and in fact, keep filling up all the pages with circles. You can maybe draw 100 circles per page, and if you have about 40 pages drawing pads, you’ll end up drawing 4,000 circles by the time you finish your first book.
-
Then on the second book, draw squares. Fill up all the pages with squares. You can do rectangles if you get bored, try different size as well.
-
Then on the third book, draw triangles.
-
On the fourth book, you’ll draw spheres. So, this time, draw not just circles, but also the shadow and the shade of the sphere.
-
For the fifth book, you’ll draw cubes. Change the direction of the light source, so you draw different shapes of shadows.
-
The final books, you should draw pyramids in the first half of the book, then you draw cylinders for the rest. Again, try different light directions.
-
Once you finish all 6 books, you’ll go back to the first book, and start coloring all circles.
-
You keep moving on to the next book with square and color them all. And you’ll finish coloring all your 6 books. Make sure when coloring objects, not only to color the shadow part darker, but give some highlight to the part where the light is hitting the most. You can either leave it white by not painting it, or add white at the end.
So by the time you finish coloring all 6 books, you’ll have your own drawing style baked into your muscle memory. Your lines, and coloring styles are your original, and it is something you’ll feel confident showing others. You’ll be so happy that you won’t have to worry about your drawing skills for the rest of your life